How to Keep Flavors from Dulling in a Slow Cooker
The slow cooker is one of the most practical appliances in any kitchen. Set it in the morning, walk away, and come home to a finished meal. But anyone who has used one long enough knows the trap: after 6–8 hours of low, sealed heat, dishes can come out tasting flat, muted, or one-dimensional. The richness you expected tastes washed out. The spices have disappeared. The herbs have lost all their punch.
This isn’t a flaw in the appliance — it’s a flaw in the approach. The slow cooker doesn’t automatically develop flavor the way stovetop or oven cooking does. It needs deliberate technique at every stage: before cooking, during, and right at the end. Master these methods and the slow cooker becomes one of the most flavor-forward tools you own.
Why Slow Cookers Dull Flavor
Before fixing the problem, it helps to understand what causes it.
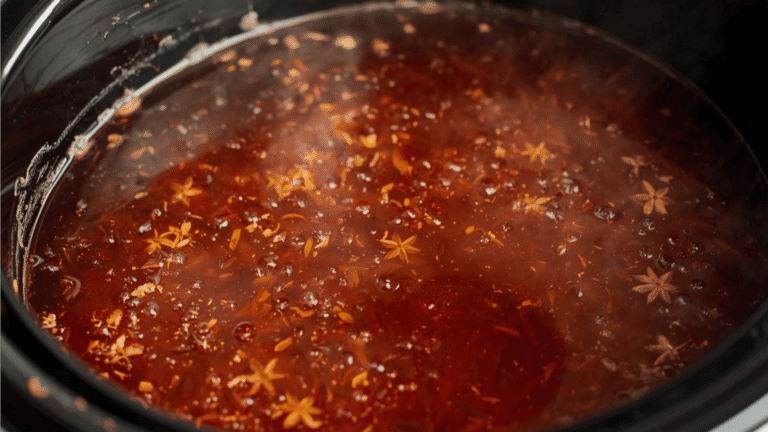
Slow cookers work by trapping moisture. The lid seals in steam, which means liquid doesn’t evaporate. This is great for keeping meat moist, but it’s terrible for flavor concentration. On the stovetop, sauces reduce and intensify. In a slow cooker, they dilute.
Heat is also a factor. Slow cookers operate between 170°F and 280°F depending on the setting. That range is enough to cook food safely, but it’s not hot enough to trigger the Maillard reaction — the chemical process responsible for the deep, savory, caramelized flavors you get from searing, roasting, or browning. Without it, meat and vegetables taste boiled rather than roasted.
Finally, prolonged exposure to heat breaks down volatile aromatic compounds in herbs and spices. The delicate oils that give fresh herbs their brightness and dried spices their punch degrade over hours of cooking, leaving behind muted, sometimes bitter remnants.
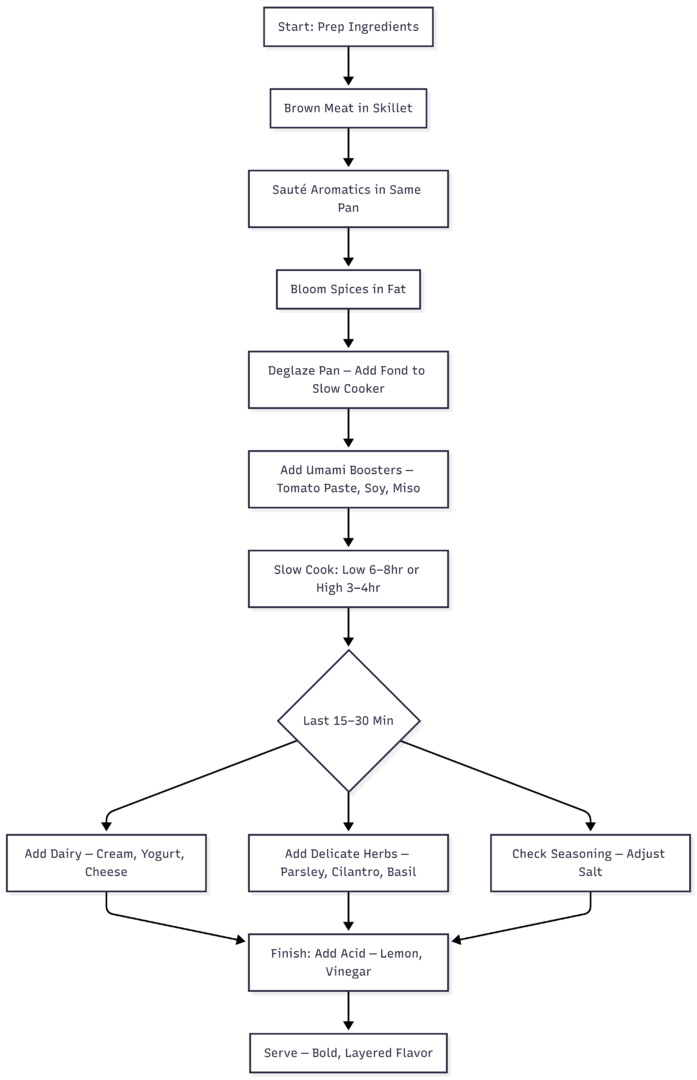
The fix is layered: build flavor before the cooker, protect flavor during, and restore flavor at the end.
Step 1: Brown Meat Before It Goes In
This single step has the biggest impact on overall flavor.
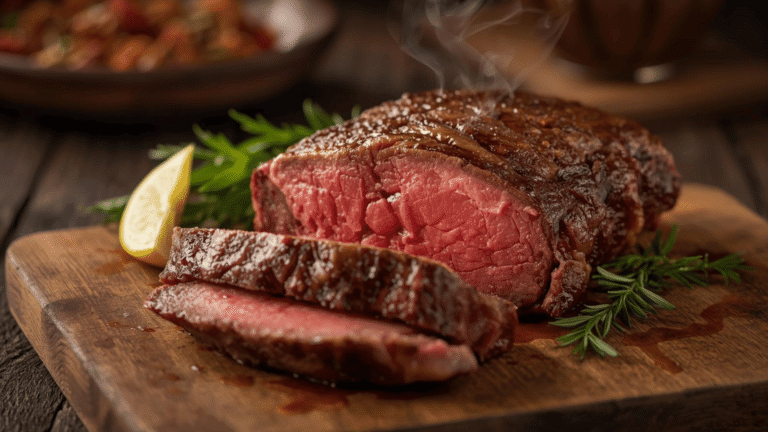
Browning meat in a hot skillet before slow cooking creates two things: a seared crust on the meat and a fond — the dark, caramelized bits stuck to the bottom of the pan. Both are flavor. The sear adds complexity to the meat itself. The fond, deglazed with broth or wine, becomes the base of your sauce.
How to do it:
- Pat meat dry with paper towels before searing (moisture prevents browning)
- Use a heavy skillet — cast iron or stainless steel — on medium-high heat
- Add a neutral oil and brown the meat in batches; don’t crowd the pan
- Deglaze the pan with broth, wine, or water, scraping up all the fond
- Pour the liquid and browned bits into the slow cooker with the meat
For roasts, sear all sides. For ground meat, cook it fully and drain the fat before adding. For chicken thighs, skin-side-down in a dry pan creates a flavorful crust without extra oil.
You don’t need to brown everything — vegetables and legumes generally don’t benefit as much. But for any recipe with beef, lamb, or pork, skipping this step leaves significant flavor on the table.
Step 2: Sauté Aromatics First
Raw onions, garlic, celery, and carrots tossed directly into a slow cooker will cook through, but they won’t caramelize. Caramelization is where sweetness and depth come from. Raw aromatics in a slow cooker stay sharp and pungent without ever softening into the round, savory backbone a good braise needs.
Spend 5–8 minutes sautéing aromatics in the same pan used for browning the meat. This does double duty: it builds on the existing fond and develops the aromatics without an extra dish.
Aromatics to always sauté first:
- Onions and shallots
- Garlic (minced or sliced)
- Leeks
- Fennel
- Bell peppers (when used as a base, not a garnish)
If you’re short on time and need to go straight to the cooker, at minimum microwave diced onions and garlic with a small pat of butter for 3–4 minutes to jump-start the cooking and reduce their raw edge.
Step 3: Bloom Spices Before Adding
Dried spices don’t release their full flavor potential until they’re exposed to heat and fat. Adding them raw to a slow cooker means they’ll cook, but slowly and inefficiently, often resulting in a dusty, muted spice flavor rather than a bold one.
Blooming means toasting spices briefly in oil or dry heat to activate their aromatic compounds. It takes 30–60 seconds but multiplies the flavor payoff dramatically.
Two methods:
| Method | How | Best For |
|---|---|---|
| Pan blooming | Add spices to hot oil or butter in skillet, stir 30–60 sec | Curries, chili, braises |
| Microwave blooming | Spices + fat in a bowl, microwave 30 sec | When skillet isn’t in use |
Whole spices (cumin seeds, coriander seeds, mustard seeds) benefit most from this. Ground spices also bloom well but need only 20–30 seconds before they risk burning.
After blooming, add your aromatics to the pan with the spices to absorb the flavored oil, then transfer everything to the slow cooker.
The Flavor Layering Framework
The core principle behind great slow cooker food is that flavor is built in layers — each added at the right moment. No single technique compensates for all the others. Together, they create dishes that taste deliberately crafted rather than just “cooked.”
Step 4: Use Umami-Rich Ingredients
Umami is the savory, deeply satisfying flavor dimension that slow-cooked dishes often lack when the other steps are skipped. Glutamate-rich ingredients compensate for the loss of browning flavor and add a rounded depth that makes a dish taste “finished.”
These ingredients don’t need browning to work — they dissolve into the cooking liquid and amplify everything around them.
| Ingredient | Amount Per Recipe | Effect |
|---|---|---|
| Tomato paste | 1–3 tbsp | Deep savory sweetness, body |
| Soy sauce | 1–2 tbsp | Salt + umami without making it taste Asian |
| Worcestershire sauce | 1–2 tbsp | Complex savory depth |
| Fish sauce | 1 tsp | Intense umami without fishiness |
| Miso paste | 1–2 tbsp | Rich, fermented depth |
| Dried porcini mushrooms | ¼ cup | Earthy umami, thickens liquid |
| Anchovy paste | 1 tsp | Melts away, adds backbone |
A common beginner mistake is relying solely on salt for seasoning. Umami ingredients do what salt cannot: they make food taste complex rather than just seasoned. Start with tomato paste and soy sauce — they’re the most versatile and hardest to overdo in small amounts.
Step 5: Control Liquid Volume
Because slow cookers don’t allow steam to escape, liquid accumulates during cooking rather than reducing. A recipe that calls for 2 cups of broth on the stovetop may only need 1 cup in a slow cooker. Too much liquid dilutes flavor — you end up with soup when you wanted a braise.
Guidelines for liquid in slow cooker recipes:
| Dish Type | Stovetop Liquid | Slow Cooker Adjustment |
|---|---|---|
| Braise (short ribs, pork) | Enough to half-submerge | Reduce by 30–40% |
| Stew | Fully submerged | Reduce by 25% |
| Chili | 2–3 cups per batch | Reduce by 20% |
| Soup | 6–8 cups | Keep same or reduce 10% |
| Roast | ½–1 cup | Keep same |
If you’re adapting a stovetop or oven recipe for the slow cooker, always start with less liquid than the original calls for. You can always add more toward the end; you can’t take it away.
To thicken a sauce that’s too thin at the end, remove the lid and switch to high for 20–30 minutes, or stir in a cornstarch slurry (1 tablespoon cornstarch mixed with 2 tablespoons cold water).
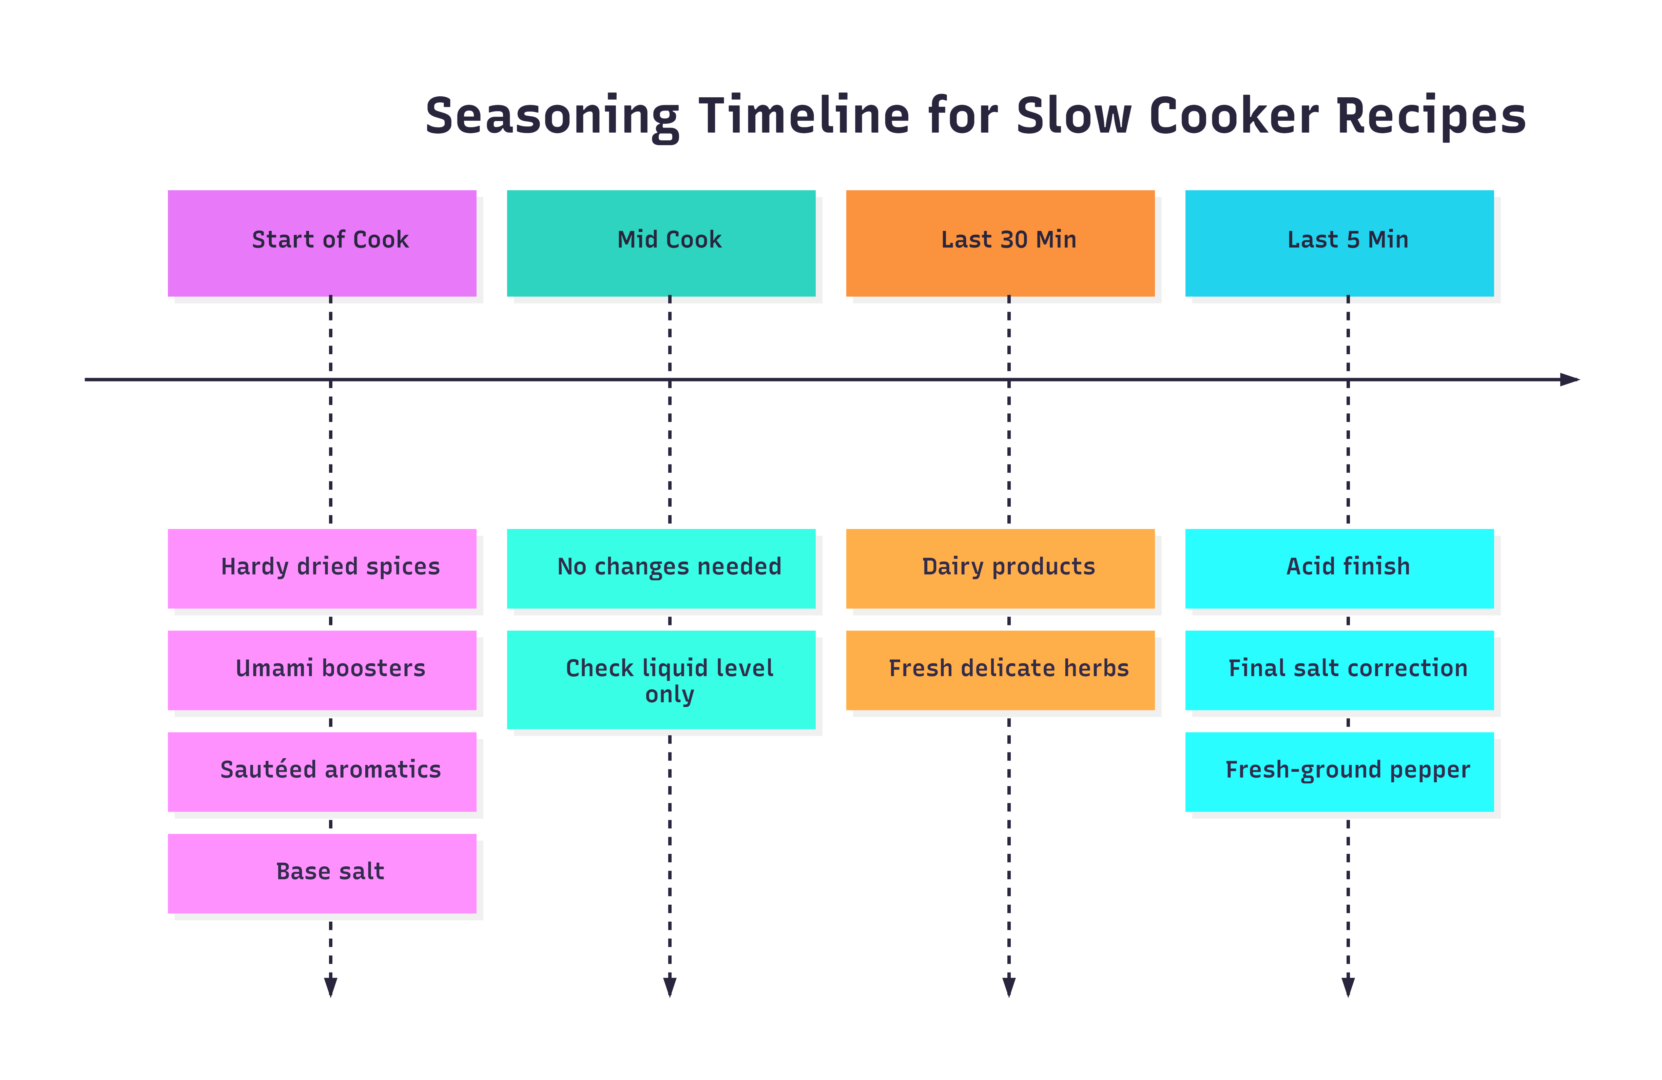
Step 6: Early vs. Late Seasoning — Getting Timing Right
Seasoning timing in a slow cooker is different from stovetop cooking. Salt draws moisture from ingredients, which is useful in some contexts but can toughen proteins if added too early in large amounts. Spices added too early lose their character. Delicate herbs added too early turn bitter.
Early Seasoning (Add at the Start)
- Dried hardy spices: cumin, smoked paprika, oregano, thyme, bay leaves, coriander
- Umami base: tomato paste, soy sauce, Worcestershire
- Aromatics: onion, garlic (sautéed first)
- Salt: a conservative base amount — typically half what you’d use at the end
Late Seasoning (Add in Last 15–30 Minutes)
- Fresh herbs: parsley, cilantro, basil, dill, tarragon
- Dairy: cream, yogurt, sour cream, cheese
- Acids: lemon juice, lime juice, vinegar
- Final salt adjustment: taste and correct right before serving
- Delicate spices: fresh-ground black pepper, fresh grated nutmeg
Step 7: Herbs vs. Spices — Different Timing, Different Rules
Herbs and spices behave differently under heat, and treating them the same is one of the most common slow cooker mistakes.
Dried spices are sturdy. Their flavor compounds are protected by cell structures that need heat to break down. Blooming accelerates this, but even without blooming, they survive long cooking. Use them at the start — just bloom them first.
Fresh herbs are fragile. Their aromatic oils are volatile and evaporate quickly under sustained heat. Added at the start, they’ll be completely flavorless by the time you serve the dish. Added in the last 15 minutes, they stay bright and impactful.
Dried herbs sit between these two extremes. Robust dried herbs — thyme, rosemary, oregano, bay — hold up reasonably well over long cooks. Delicate dried herbs — dill, tarragon, chervil — should be added toward the end, even in dried form.
| Herb/Spice | Type | Add When | Notes |
|---|---|---|---|
| Cumin | Dried spice | Start | Bloom first |
| Smoked paprika | Dried spice | Start | Bloom first |
| Bay leaves | Dried herb | Start | Remove before serving |
| Dried thyme | Dried herb | Start | Hardy, survives long cook |
| Dried oregano | Dried herb | Start | Hardy |
| Dried dill | Dried herb | Last 30 min | Delicate even dried |
| Fresh rosemary | Fresh herb | Last 20 min | Woody stems can stay longer |
| Fresh parsley | Fresh herb | Last 10 min | Wilts fast |
| Fresh cilantro | Fresh herb | At serving | Loses aroma almost instantly |
| Fresh basil | Fresh herb | At serving | Never cook, always garnish |
| Black pepper | Spice | Last 5 min | Fresh ground only |
Step 8: The Acid Finish
This is the most underused technique in slow cooker cooking and the one with the most immediate, dramatic impact.
After hours of cooking, slow cooker dishes accumulate fat and richness. Without acid, they taste heavy and one-dimensional. A small amount of acid — lemon juice, lime juice, red wine vinegar, balsamic vinegar, or even apple cider vinegar — doesn’t make the dish taste sour. It balances the richness, lifts the other flavors, and makes everything taste brighter and more distinct.
Add acid at the very end, off heat or in the last 5 minutes. Start small — 1 teaspoon of lemon juice in a chicken stew — taste, and adjust. You’ll almost always want more than you initially add.
Acid pairings by dish type:
| Dish | Recommended Acid | Amount |
|---|---|---|
| Beef stew or braise | Red wine vinegar | 1–2 tsp |
| Chicken dishes | Lemon juice | 1–2 tbsp |
| Pork dishes | Apple cider vinegar | 1–2 tsp |
| Tomato-based chili | Lime juice | 1 tbsp |
| Bean soups | Sherry vinegar | 1 tsp |
| Cream-based dishes | White wine vinegar | ½–1 tsp |
Step 9: Dairy — When and How to Add It Without Curdling
Dairy is a special case in slow cooker cooking. Milk, cream, yogurt, sour cream, and cheese all separate or curdle when exposed to prolonged high heat. The proteins in dairy coagulate when overheated, leaving a grainy, broken texture that no amount of stirring can fix.
The solution is timing and fat content.
Core rules for dairy in a slow cooker:
- Add it late: Dairy goes in during the final 15–30 minutes of cooking, never at the start
- Use high-fat dairy: Heavy cream, full-fat yogurt, and full-fat cheese are far more stable than low-fat alternatives
- Temper cold dairy: Mix a few spoonfuls of the hot cooking liquid into cold dairy (sour cream, yogurt) before stirring it into the pot — this prevents thermal shock and curdling
- Don’t boil after adding: Once dairy is in, keep heat on low or turn the cooker off
- Use stabilized alternatives: Cream cheese and evaporated milk are more heat-stable than fresh dairy for longer additions
| Dairy Product | Stability | Add When | Notes |
|---|---|---|---|
| Heavy/double cream | High | Last 20–30 min | Best all-purpose choice |
| Full-fat yogurt | Medium | Last 15–20 min | Temper first |
| Sour cream | Medium | Last 15 min | Temper first |
| Cream cheese | High | Last 30 min | Blends smoothly, very stable |
| Evaporated milk | High | Last 20–30 min | Best milk substitute |
| Whole milk | Low | Last 10–15 min | Use only if necessary |
| Shredded cheese | Medium | Last 15 min | Add in small amounts, stir well |
Bringing It All Together: Quick-Reference Summary
| Phase | Action | Why It Matters |
|---|---|---|
| Before | Brown meat in skillet | Maillard reaction, fond for sauce base |
| Before | Sauté aromatics | Caramelization, softer flavor |
| Before | Bloom dried spices | Activates aromatic compounds |
| Start | Add umami boosters | Depth without browning |
| Start | Use reduced liquid volume | Prevents dilution |
| Start | Add hardy herbs and base salt | Foundation flavor |
| End (30 min) | Add dairy | Prevents curdling |
| End (15 min) | Add delicate fresh herbs | Preserves aroma |
| End (5 min) | Add acid finish | Brightness and balance |
| End (5 min) | Adjust salt and pepper | Final seasoning correction |
Final Thoughts
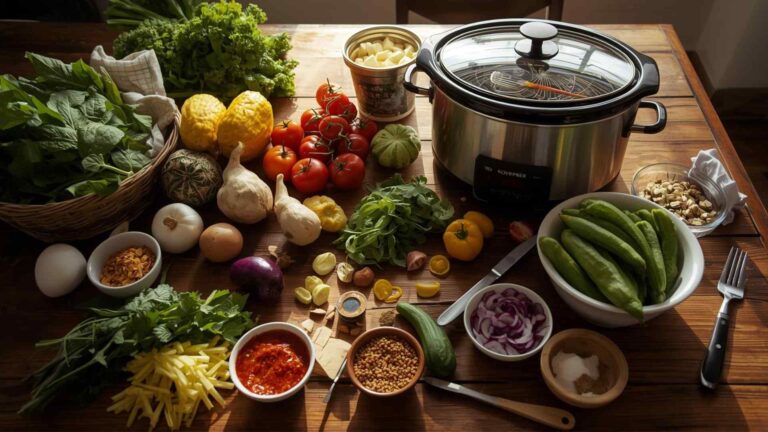
A slow cooker doesn’t create flavor on its own — it concentrates and melds whatever you give it. If you give it raw ingredients thrown in without preparation, it gives back a flat, diluted meal. If you give it browned meat, sautéed aromatics, bloomed spices, and a well-judged amount of liquid, it returns something deeply satisfying.
The techniques here don’t transform slow cooking into an all-day stovetop project. Most of the active work — browning, sautéing, blooming — takes 10–15 minutes before you set the cooker. The finishing steps take 5 minutes at the end. Everything in between is hands-off.
That’s still the promise of the slow cooker: most of the time, it works without you. The difference is that now, when you lift the lid, the food inside will actually taste like something worth eating.
Please share this How to Keep Flavors from Dulling in a Slow Cooker with your friends and do a comment below about your feedback.
We will meet you on next article.
Until you can read, How to brown meat in a slow cooker?