Why does my meat always go dry in my slow cooker
You followed the recipe. You set it and forgot it. But hours later, you lifted the lid and found something closer to jerky than a tender braise. Dry meat from a slow cooker is one of the most common cooking frustrations — and almost always preventable. The fix isn’t complicated, but it requires understanding why it happens in the first place.
The Real Reason Slow Cooker Meat Goes Dry
Slow cookers work by trapping steam and cooking food in a moist, low-heat environment. When meat dries out, one of three things went wrong: you chose the wrong cut, you cooked it too long (or on too high a setting), or you managed moisture incorrectly.
Here’s the science behind it: muscle fibers in meat contract and squeeze out moisture as they heat. With the right cut cooked at the right temperature, collagen in the connective tissue converts to gelatin, which keeps the meat moist and gives it that fall-apart texture. With the wrong cut or too much heat, you lose moisture faster than gelatin can compensate — and the result is dry, stringy meat.
Cut Selection: The Single Biggest Variable
This is where most people go wrong. Lean cuts — chicken breast, pork loin, sirloin — have almost no connective tissue or intramuscular fat. They go dry quickly under any cooking method, and slow cookers make it worse because of the extended cooking time.
Fatty, collagen-rich cuts are built for slow cooking. The longer cooking time breaks down tough connective tissue into gelatin, which bastes the meat from the inside.
| Cut | Type | Slow Cooker Suitability | Notes |
|---|---|---|---|
| Beef chuck | Beef | ✅ Excellent | Ideal for pot roast, stews |
| Beef brisket | Beef | ✅ Excellent | Rich flavor, very forgiving |
| Beef short ribs | Beef | ✅ Excellent | Falls off the bone |
| Round steak | Beef | ⚠️ Moderate | Use with plenty of liquid |
| Sirloin | Beef | ❌ Poor | Too lean, dries quickly |
| Pork shoulder | Pork | ✅ Excellent | Perfect for pulled pork |
| Pork loin | Pork | ❌ Poor | Very lean, overcooks fast |
| Pork belly | Pork | ✅ Excellent | High fat, stays moist |
| Chicken thighs | Chicken | ✅ Excellent | More fat than breast |
| Chicken breast | Chicken | ❌ Poor | Dries out easily |
| Lamb shoulder | Lamb | ✅ Excellent | Rich, tender result |
| Lamb leg | Lamb | ⚠️ Moderate | Watch cooking time carefully |
The rule of thumb: if a cut would normally be tough on the stovetop, it will be excellent in the slow cooker. If it’s naturally tender and quick-cooking, the slow cooker will ruin it.
Low vs. High: Why the Setting Matters More Than You Think
Most slow cookers have two settings — Low and High. Both reach approximately the same final temperature (around 190–210°F / 87–99°C), but they get there at different rates. The difference is in how fast moisture is driven out of the meat.
Low setting heats gradually, giving collagen time to break down into gelatin before the muscle fibers seize and squeeze out all their moisture. This is the setting that produces genuinely tender, juicy results.
High setting heats faster. For stews and braised dishes with plenty of liquid, this is acceptable. For larger cuts of meat, cooking on High often means the exterior overcooks before the interior is properly done — and that’s where dryness comes from.
Low (8–10 hrs) → Gradual heat rise → Collagen breaks down → Gelatin keeps meat moist → Tender result
High (4–6 hrs) → Faster heat rise → Muscle fibers contract faster → Moisture expelled → Risk of dryness
The general conversion is: 1 hour on High ≈ 2 hours on Low. When in doubt, go Low and go longer.
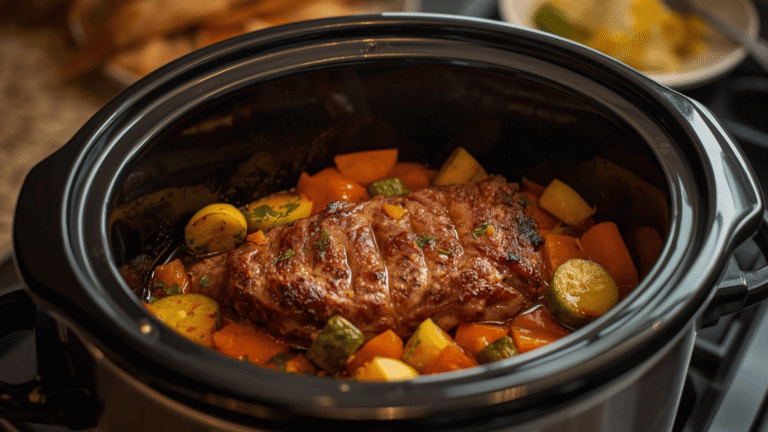
How Much Liquid Do You Actually Need?
This is the most debated point in slow cooker cooking, and it trips up beginners every time. The instinct is to add lots of liquid — stock, water, sauce — to keep meat moist. But too much liquid causes a different problem: the meat boils instead of braises.
Boiling toughens and dries meat. It forces moisture out of muscle fibers at high speed. A slow cooker should braise, not boil — meaning the meat sits partially submerged in liquid, cooking in steam and gentle heat.
The correct liquid level:
- Fill the slow cooker half to two-thirds full total (meat + vegetables + liquid combined)
- For roasting joints with no sauce, you only need a small amount of liquid at the base — roughly ½ cup (120ml) — just enough to create steam and protect the ceramic from cracking
- For stews and braised dishes, liquid should come about halfway up the meat, not over it
Remember: meat releases its own juices during cooking. A 2kg beef chuck will release a significant amount of liquid over 8 hours. If you fill the pot to the brim at the start, you’ll end up with boiling meat swimming in excess liquid.
The Lid Rule: Don’t Open It
Every time you lift the slow cooker lid, you lose 15–20 minutes of cooking time. Steam escapes, temperature drops, and the moist cooking environment is disrupted. Opening the lid repeatedly causes the meat to cook unevenly — the outside dries while the inside struggles to reach temperature.
Only remove the lid when you need to add ingredients in the final stages (like dairy, fresh herbs, or thickening agents) or to check doneness near the end of the cooking window.
Seasoning Timing: Early vs. Late
Seasoning in a slow cooker works differently from stovetop cooking. The extended cooking time changes how salt, herbs, and spices behave.
Salt and Aromatics (Add Early)
Salt added at the start draws moisture from the meat through osmosis initially, but over the long cooking time, it penetrates the muscle fibers and actually helps retain moisture in the final dish. Add salt, garlic, onions, and aromatics at the beginning.
Dried Herbs vs. Fresh Herbs
Dried herbs can withstand long cooking times. Robust dried herbs — thyme, rosemary, oregano, bay leaves — benefit from being added at the start. Their essential oils release slowly and infuse the entire dish.
Fresh herbs, however, lose their color and flavor compounds quickly when heated for hours. Add fresh parsley, basil, coriander, or chives in the last 15–30 minutes or as a garnish when serving.
Spices: Bloom Early, Refresh Late
Ground spices like cumin, paprika, and coriander are best added at the start, where the long cook extracts their fat-soluble flavor compounds into the braising liquid. However, after 8 hours, some spices can turn bitter or muddy. A small amount of fresh spice added 30 minutes before serving can brighten the dish significantly.
Acids and Dairy: Always Late
Tomatoes, vinegar, wine, and citrus juice all interfere with collagen breakdown when added too early. Add acidic ingredients in the last 1–2 hours. Dairy — cream, milk, cheese, yogurt — should go in the last 15–30 minutes to avoid curdling.
Flavor Layering in Slow Cooker Cooking
Getting deep, complex flavor from a slow cooker requires layering ingredients at the right stages rather than dumping everything in at once.
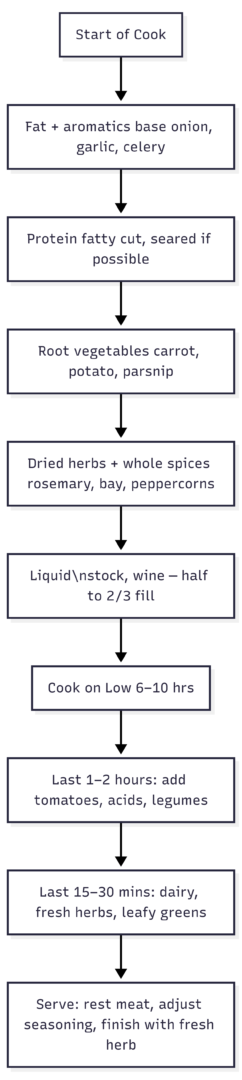
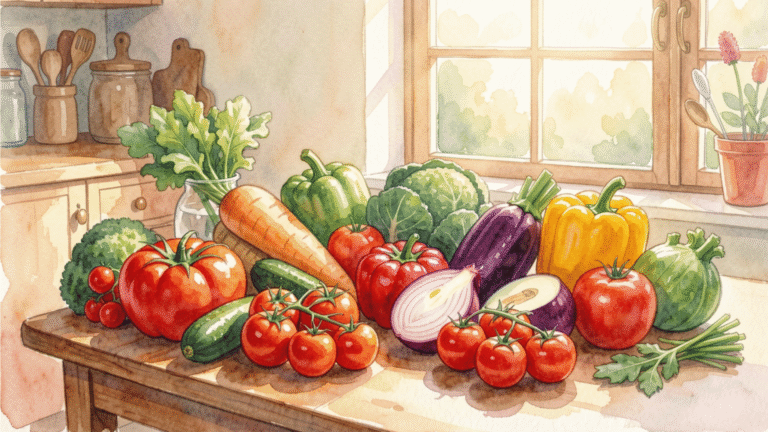
Layer 1 — Base aromatics: Onion, celery, garlic, and carrots form the flavor foundation. Place root vegetables at the bottom since they take longer to cook and also protect the meat from direct bottom heat.
Layer 2 — Protein: Place meat on top of vegetables, not directly on the ceramic base. This prevents the bottom of the meat from overcooking.
Layer 3 — Liquids and dried seasonings: Add stock, wine, or water with dried herbs and spices.
Layer 4 — Late additions: Acidic ingredients, dairy, and fresh herbs added in the final stages preserve their flavor and prevent texture problems.
Pre-Searing: Does It Actually Help?
Searing meat before slow cooking is one of the most contested topics in slow cooker communities. Does it help? Yes — but not for moisture retention. The Maillard reaction (the browning that happens at high heat) creates hundreds of flavor compounds that don’t develop in a slow cooker’s moist environment. Searing adds flavor, not moisture.
If you have time, sear large cuts in a hot pan with a little oil before transferring to the slow cooker. It takes 5 minutes and makes a noticeable difference in flavor depth. If you’re doing a true dump-and-go recipe, it’s not essential — but it is worth it.
Resting the Meat After Cooking
This step is almost always skipped, and it’s a significant mistake. When meat finishes cooking, its muscle fibers are contracted and the juices are pushed toward the center. If you slice it immediately, those juices run out onto the cutting board and the meat feels drier on the plate.
Resting allows the fibers to relax and reabsorb those juices. For a large joint, rest it uncovered for 15–30 minutes before slicing. For smaller cuts, 10 minutes is enough. The difference in perceived juiciness is substantial.
Using a Roasting Bag or Liner
Several experienced slow cooker cooks swear by placing meat inside an oven/roasting bag before putting it in the slow cooker. The bag traps all steam and juices directly around the meat, creating an even more concentrated moist environment. It also makes cleanup significantly easier.
Poke one or two small holes in the bag to allow some steam to vent, and cook as normal.
Troubleshooting: Matching the Problem to the Fix
| Problem | Likely Cause | Fix |
|---|---|---|
| Meat is dry and stringy | Overcooked on High, or wrong cut | Switch to Low; use chuck, shoulder, thighs |
| Meat is dry but cooked through | Too much liquid (boiling not braising) | Reduce liquid to half-fill level |
| Exterior dry, interior fine | Heat too high, lid opened repeatedly | Use Low setting, don’t open lid |
| Chicken breast dry | Wrong cut | Switch to chicken thighs |
| Leftovers are dry | No liquid stored with meat | Reserve some cooking liquid, store meat submerged |
| Pork loin tough and dry | Too lean for slow cooking | Use pork shoulder instead |
| Beef roast dry | Cooked too long or on High | 6–8 hrs on Low maximum for most roasts |
Quick-Reference: Slow Cooker Meat Timing Guide
| Meat | Setting | Time | Liquid Needed |
|---|---|---|---|
| Beef chuck (1–1.5kg) | Low | 8–10 hrs | ½–1 cup stock |
| Beef brisket (1.5kg) | Low | 8–10 hrs | 1 cup stock + aromatics |
| Pork shoulder (1.5kg) | Low | 8–10 hrs | ½ cup liquid minimum |
| Chicken thighs (bone-in) | Low | 5–6 hrs | ¼–½ cup liquid |
| Lamb shoulder (1.5kg) | Low | 7–9 hrs | 1 cup stock |
| Braising steak (500g) | Low | 6–8 hrs | Enough to half-cover |
| Whole chicken (1.5kg) | High | 3–4 hrs | ¼ cup liquid |
| Pork ribs | Low | 6–8 hrs | ½ cup liquid |
Summary: The Seven Rules for Moist Slow Cooker Meat
- Choose the right cut. Fat and collagen = moisture. Lean cuts will always struggle.
- Cook on Low. Slower heat means better collagen breakdown and more gelatin.
- Use the right amount of liquid. Half to two-thirds full total. Don’t cover the meat completely.
- Don’t lift the lid. Every peek costs 15–20 minutes and disrupts the moist environment.
- Layer your ingredients properly. Vegetables on the bottom, meat on top.
- Time your seasonings. Dried herbs and salt early; fresh herbs, dairy, and acids late.
- Rest the meat before serving. 15–30 minutes makes a real difference in juiciness.
Slow cookers reward patience and the right starting ingredients. Get the cut right, manage your liquid level, and resist the urge to check on it — and dry meat becomes a problem you used to have.
Please share this Why does my meat always go dry in my slow cooker with your friends and do a comment below about your feedback.
We will meet you on next article.
Until you can read, How to Keep Flavors from Dulling in a Slow Cooker